
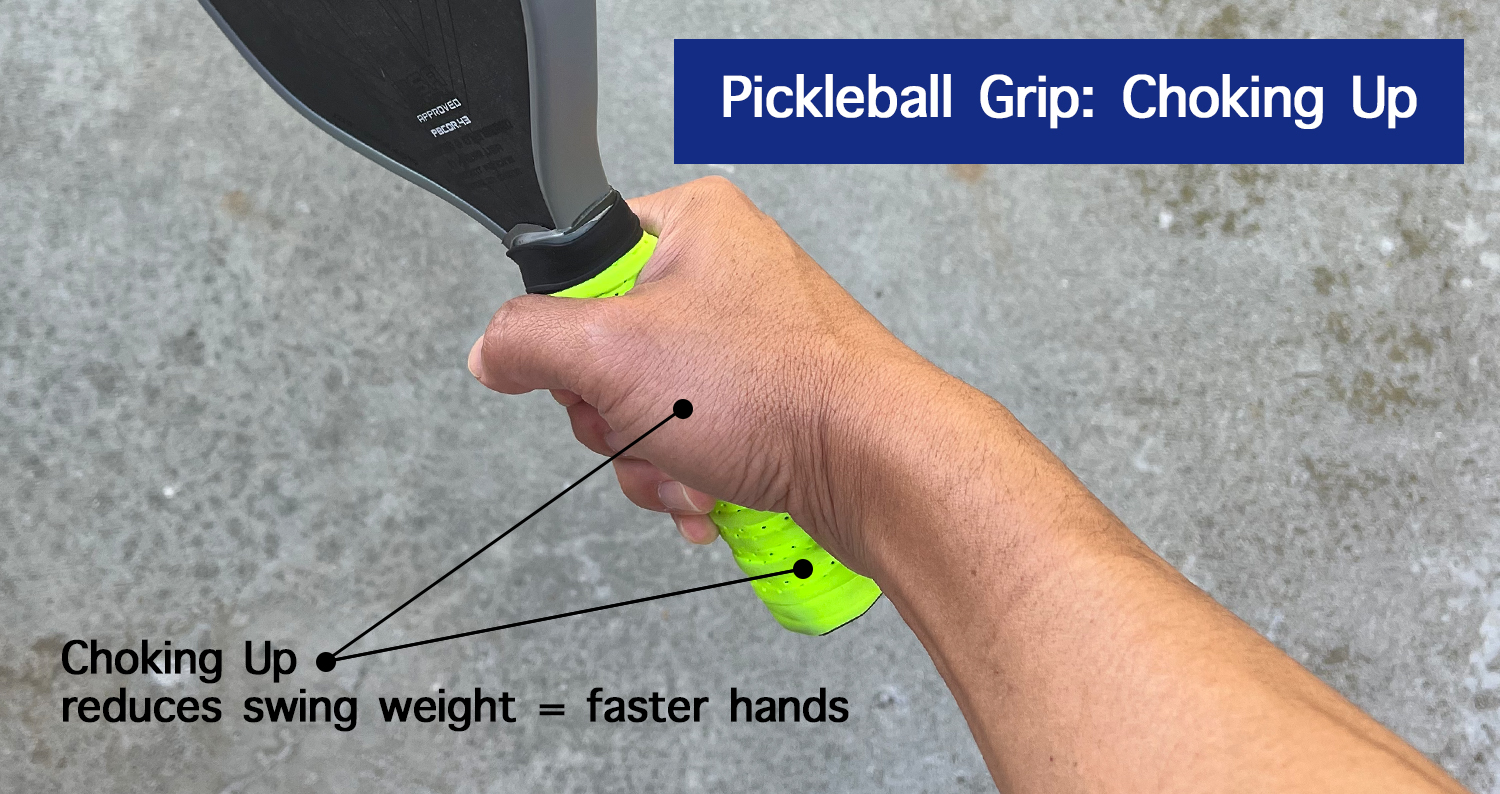
Whether you watch professional matches or observe high-level open play, you will notice that the best players rarely keep their hands static. One of the most impactful modern mechanical trends—popularized on the pro tour by stars like Gabe Tardio—is choking up on the paddle handle.
Altering your hand placement between the baseline and the kitchen line fundamentally transforms how your paddle handles.
What Exactly Is Hand Position on the Handle?
Hand position is entirely separate from your grip type (such as the Continental, Eastern, or Western grips). While your grip type dictates which bevel your hand rotates to, hand position is how far up or down the handle your hand sits, independent of that rotation.
Choking up means sliding your hand higher up the handle toward the paddle face, positioning your index finger right near the paddle’s throat. By doing this, you shorten the physical lever between your hand and the paddle head.
💡 CRUCIAL CONCEPT: A choked-up grip doesn’t change the paddle’s actual static weight—it drastically alters its swing weight (rotational inertia). By moving the paddle’s mass closer to your pivot point (your wrist), you lower the swing weight (often by as much as 20 points). This means it takes significantly less muscular effort to redirect the paddle quickly, giving you a massive advantage during fast hand exchanges.
Quick Summary
-
At the Baseline: Position your hand near the bottom of the handle to maximize your lever arm, generating peak paddle-head speed and maximum power for drives and serves.
-
At the Kitchen: Slide your hand up toward the throat to lower the effective swing weight, unlocking rapid volley speed, precise dink control, and easier wrist manipulation.
-
The Trade-off: Choking up reduces your reach by an inch or two; hanging off the very end of the handle sacrifices hand speed and leaves you prone to getting “jammed.”
-
Pro Tip: Many players use the “finger on the face” trick, extending their index finger up the back of the paddle face to lock the wrist and maximize stability on backhand dinks and resets.
How to Do It: A Step-by-Step Guide
1. Baseline Setup
Let your hand settle near the bottom of the handle, with roughly 1–2 inches of the handle extending below your pinky (or your pinky slightly overlapping the butt cap). This creates maximum whip.
2. Transition Slide
As you move forward into the transition zone following a third-shot drop or drive, use your non-dominant hand to lightly guide and slide your dominant hand an inch or two up the handle.
3. Kitchen Setup
Settle high enough that the butt cap sits completely clear of or just above your palm heel. Your index finger should sit close to the throat. Optional variation: Extend your index finger up across the lower part of the hitting surface for added backhand tracking.
4. Reset on Retreat
If you are pushed back by a deep lob or overhead and must retreat to the baseline, actively slide your hand back down to the bottom of the handle to regain your power leverage.
The Biomechanics: Lever Arm vs. Swing Weight
The physics of a pickleball swing come down to a basic mechanical tradeoff:
-
A longer lever (hand at the very bottom of the handle) increases the linear speed of the paddle head for a given amount of arm rotation. This maximizes the outward centrifugal force, allowing you to whip the paddle through the ball to generate heavy pace and deep topspin on drives.
-
A shorter lever (choked up) brings the paddle’s center of mass closer to your hand. This reduces rotational inertia, meaning your forearm and wrist can snap, flick, and reposition the paddle face with minimal resistance. This makes it significantly easier to hit backhand rolls, defend body shots, and absorb the pace of hard volleys.
Body Positions by Importance
| Body Part | Why It Matters | What Happens If It’s Wrong |
|---|---|---|
| 1. Hand (Position) | The primary variable for shifting your mechanical advantage and altering effective swing weight. | Using a static hand position all over the court misses out on both baseline power and kitchen maneuverability. |
| 2. Forearm | The forearm muscles bear the brunt of torque; choking up minimizes the strain and fatigue required to redirect fast balls. | Leaving your hand at the bottom of the grip during rapid net volleys forces the forearm to work double-time, slowing reaction speed. |
| 3. Index Finger (Optional) | Optional: Placing it up the back of the paddle face stabilizes the paddle angle, working like a rigid extension of your arm. | Forcing this grip variation if you don’t naturally prefer it can limit your wrist flexibility and compromise your touch on forehand rolls. |
| 4. Fingers (Reset Timing) | Your fingers must stay relaxed (aiming for a grip pressure of 3 to 4 out of 10) to seamlessly slide up and down the handle. | Death-gripping the paddle prevents fluid transitions, locking you into the wrong hand position when moving between zones. |
Common Mistakes & The Cost
Mistake: Keeping the same hand position everywhere on the court
-
The Penalty: You miss the rapid-fire swing-weight benefits at the kitchen and sacrifice maximum leverage at the baseline.
-
The Fix: Tie your hand adjustments directly to your footwork. As you step up to the non-volley zone, slide up; when stepping back, slide down.
Mistake: Choking up too aggressively
-
The Penalty: Moving your hand too high into the face sacrifices crucial reach and jams your ability to comfortably hit two-handed backhands.
-
The Fix: Find the “sweet spot” of choking up—keep your index finger near the throat rubber but ensure there is still room for your remaining fingers to securely wrap around the handle wrap.
Mistake: Forgetting to reset your hand position when retreating
-
The Penalty: Leaves you with a shortened lever arm at the baseline, completely neutralizing your power on deep drives and passing shots.
-
The Fix: Use your non-dominant hand as a guide during your retreat to actively push the paddle upward, letting your dominant hand slide smoothly back down to the butt cap.
Frequently Asked Questions
Why do pros choke up on their paddle at the kitchen line?
Choking up lowers the paddle’s effective swing weight, giving players faster hand speed and sharper paddle face manipulation during rapid-fire volley exchanges. The minor loss of an inch of reach is an easy trade-off for winning hand battles.
Does choking up hurt my power on drives?
Yes. A shorter lever arm generates less paddle-head velocity. If you remain choked up at the baseline, your serves, returns, and drives will lack depth and maximum pace, which is why players choke down when playing from the back of the court.
Is the index-finger-on-the-back technique real or just preference?
It is a legitimate technique borrowed heavily from table tennis. Placing the index finger flat against the back of the paddle gives incredible stability for backhand dinks, resets, and blocks. However, it is a personal preference—if it limits your comfort or forehand flexibility, keep your fingers wrapped fully around the handle.
How long does it take to get used to shifting your grip during a point?
For most players, it takes a few weeks of deliberate practice to build the muscle memory. Incorporating hand-sliding adjustments into your everyday wall drills is the fastest way to make this transition feel completely natural.
Next Posts
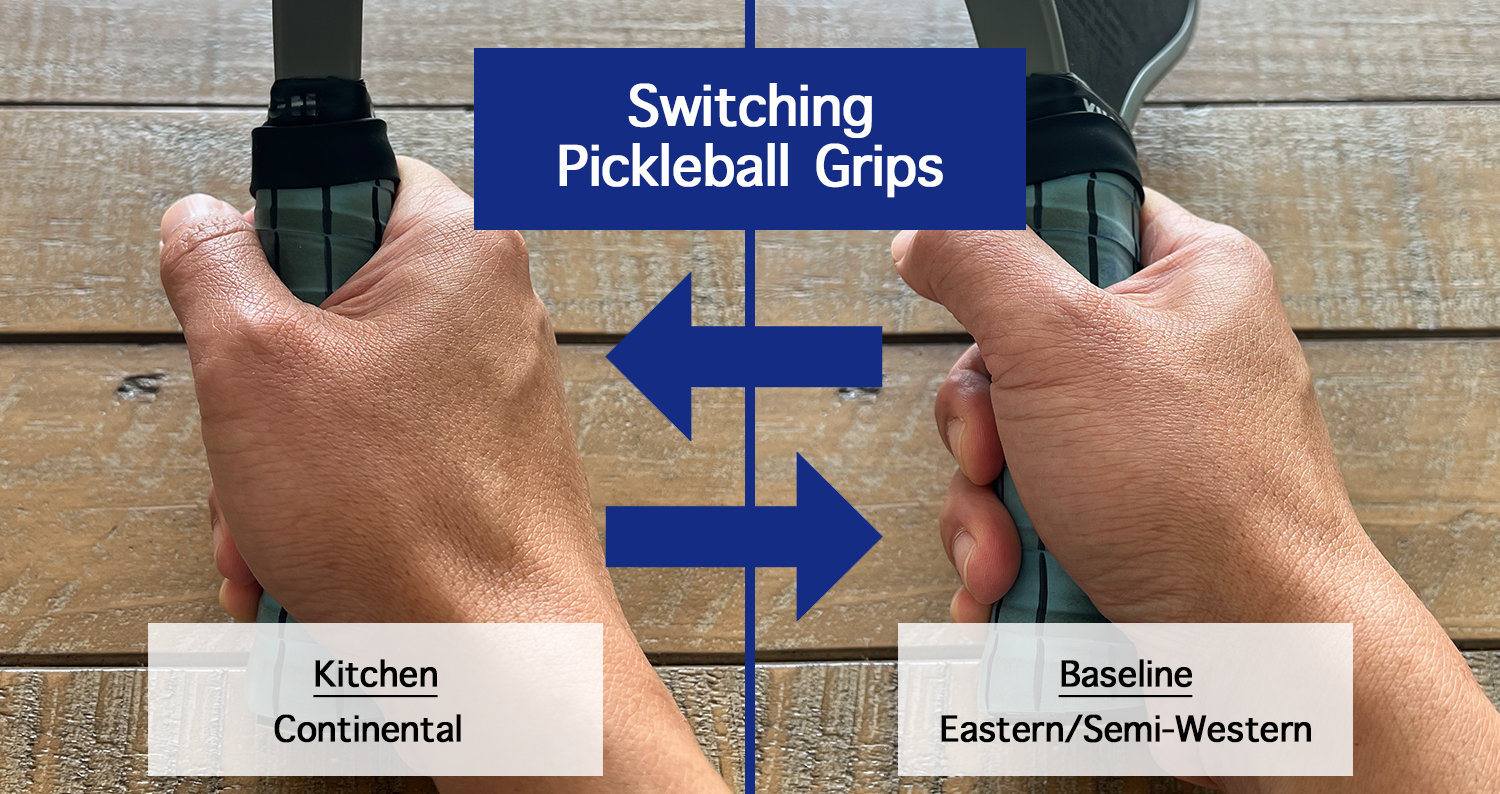
Switching Pickleball Grips
Switching pickleball grips between baseline power and kitchen neutrality, explained with the exact timing pros use to keep it fast and unnoticed.
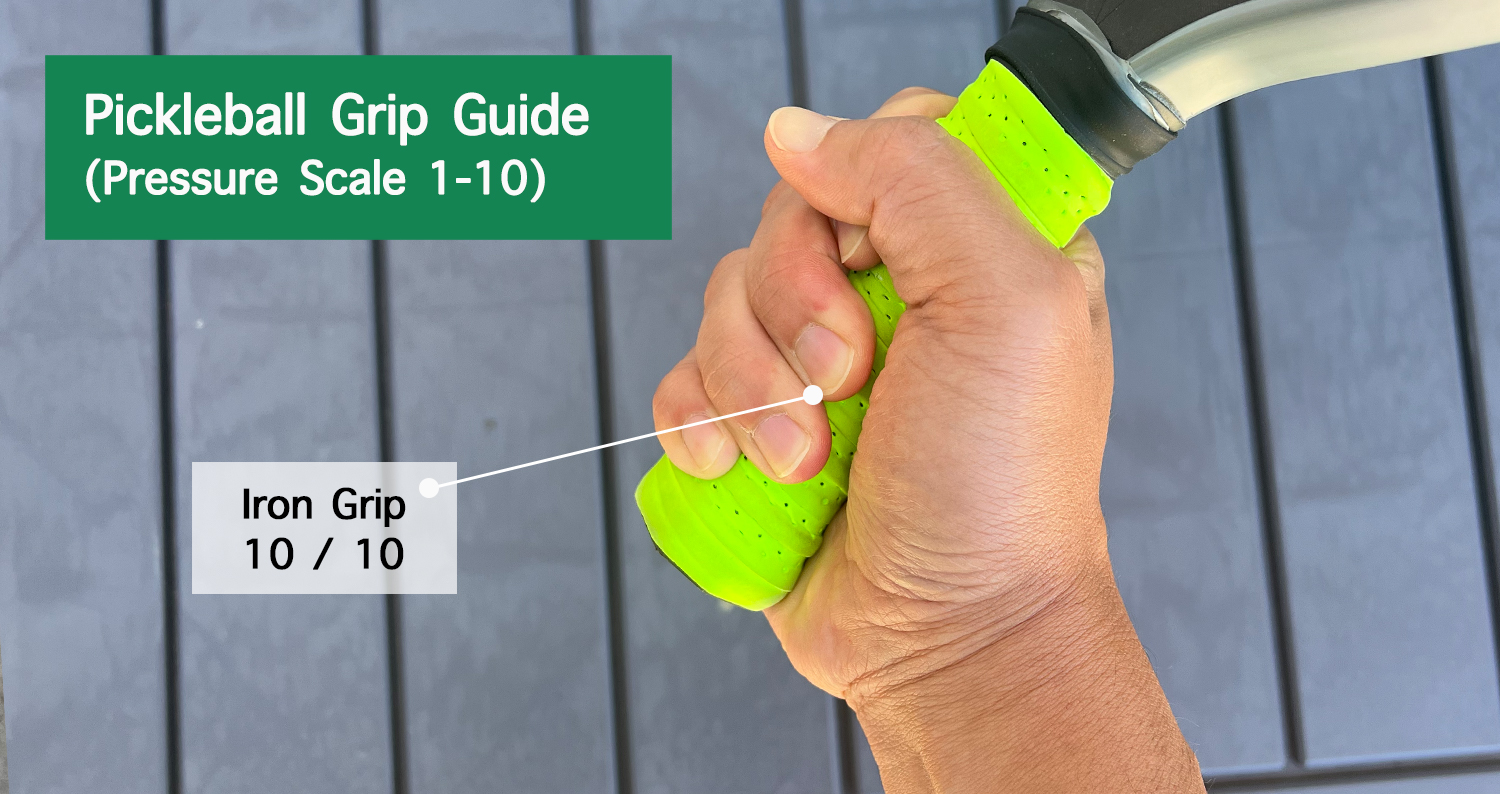
Pickleball Grip Pressure: The 1-to-10 Scale Explained
Pickleball grip pressure explained using the 1-to-10 scale coaches use — exact pressure targets by shot type and why tight grips cause pop-ups.
Pickleball Ready Position
Master the pickleball ready position — exact knee bend, foot width, and weight distribution that sets up every shot you'll ever hit.
continue reading
Related Posts
Pickleball sliding practice explained — how a controlled slide spreads deceleration force over distance instead of one hard stop, and how to train it off-court.
Wide stance deceleration in pickleball explained — why sudden stops stress the knees and ankles, and how a wider base distributes that force safely.
Pickleball lob footwork explained step by step — the pivot, drop step, and shuffle or crossover run that replaces backpedaling for any lob.